介紹建立 API 的方法 – 3 後台管理者權限

以下繼續介紹如何建立 API
權限為 需有 後台管理者權限 才能存取
取得 token
(每次取得的 token 皆不同)
url : http://{domain_name}/index.php/rest/V1/integration/admin/token
- get token by postman

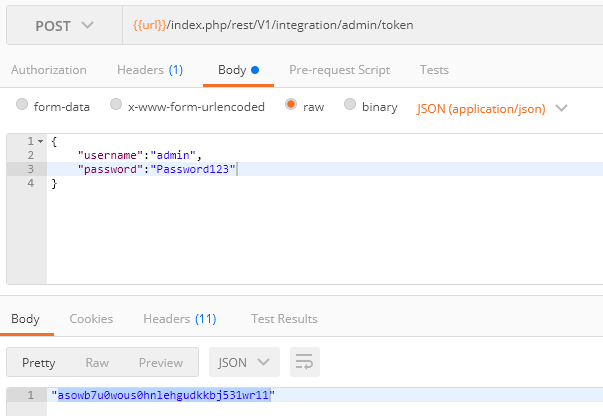
crul 取 token 請參考 “介紹建立 API 的方法 – 2 前台會員權限" ,不再贅述
帶入 token 取得會員資料
url : http://{domain_name}/index.php/rest/V1/customers/{customer ID}
- get data by postman
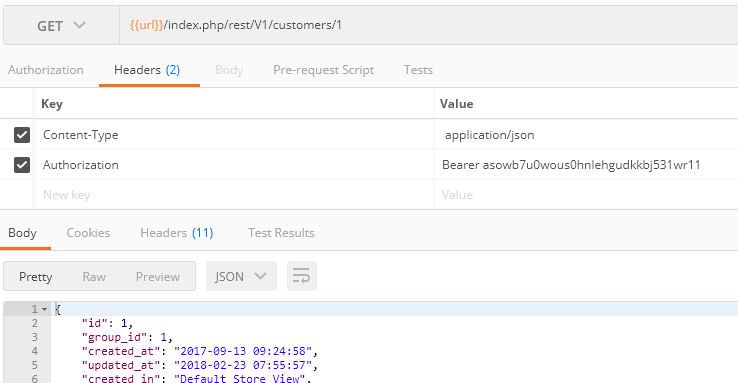
crul 取 token 請參考"介紹建立 API 的方法 – 2 前台會員權限" ,不再贅述
自訂的 API 權限
建立 \Astralweb\Tech\etc\acl.xml
修改為
<?xml version="1.0"?>
<config xmlns:xsi="http://www.w3.org/2001/XMLSchema-instance" xsi:noNamespaceSchemaLocation="urn:magento:framework:Acl/etc/acl.xsd">
    <acl>
        <resources>
            <resource id="Magento_Backend::admin">
                <resource id="Astralweb_Tech::hello" title="Hello" translate="title" sortOrder="110" />
            </resource>
        </resources>
    </acl>
</config>
其中 Astralweb_Tech::hello 即為自訂的權限
Hello 為該權限的名稱
將 \Astralweb\Tech\etc\webapi.xml
修改為
<?xml version="1.0"?>
<routes xmlns:xsi="http://www.w3.org/2001/XMLSchema-instance" xsi:noNamespaceSchemaLocation="urn:magento:module:Magento_Webapi:etc/webapi.xsd">
    <route url="/V1/hello/name/:name" method="GET">
        <service class="Astralweb\Tech\Api\HelloInterface" method="name"/>
        <resources>
            <resource ref="Astralweb_Tech::hello"/>
        </resources>
    </route>
</routes>
則該 API 需有相對應的權限才可進入
※改完 xml 需清暫存※
後台
SYSTEM -> Permissions > User Roles
可新增 Role 或修改 原有 Role
並指定 Role Resources
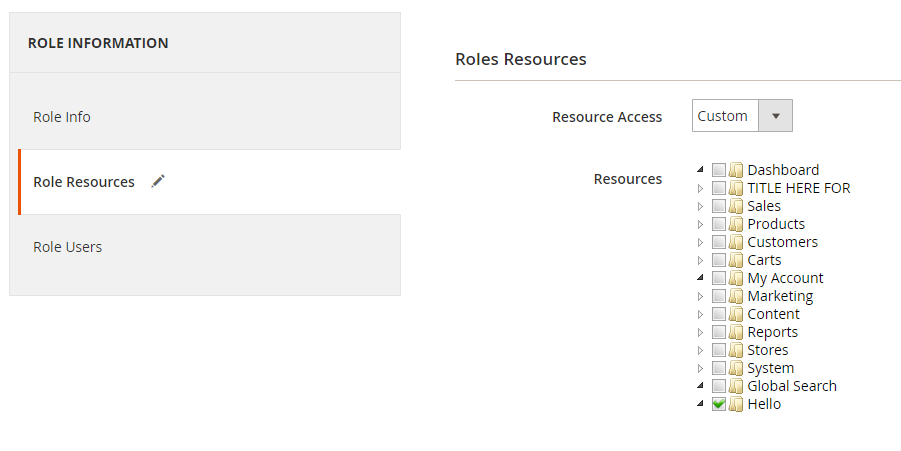
後台
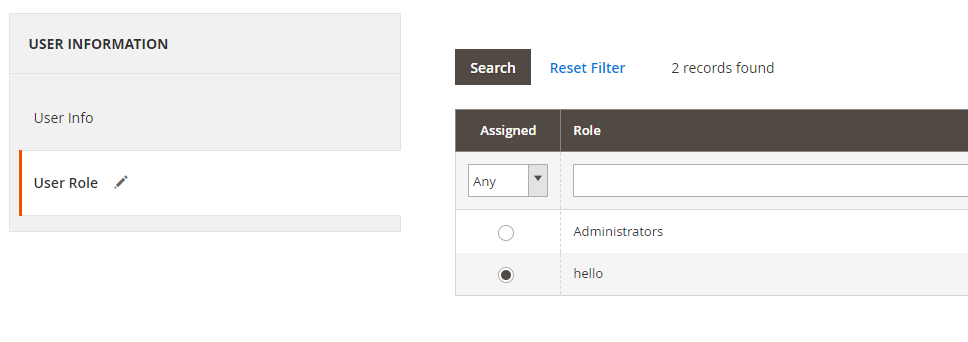
SYSTEM -> Permissions > All Users
修改 User Role 指定對應的 Role
則該帳號取得的 token 即可有對應的權限
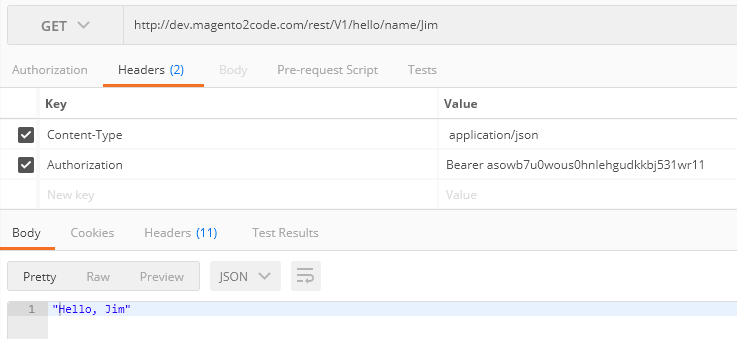
後續還是會介紹更多不同權限的API建立方法,或想了解其他關於Magento的訊息,可繼續閱讀追蹤我們的文章喔!
也可以關注我們 Facebook的粉絲專頁,我們會不定期新增文章跟大家分享!




我要留言