使用Magento2 原生工具來將LESS編譯成CSS

Compile LESS using Grunt (Magento 2 regular tools)
Magento2 提供Blank以及Luma二款預設的主題包,這二款主題包都是使用LESS來編譯CSS。在這篇文章中,我們要為您介紹如何使用Grunt來開發及調整CSS。
1 首先為您的開發環境安裝 Node js。
2 首先為您的開發環境安裝Grunt。
npm install -g grunt-cli
3 在Magent2 的根目錄底下找到以下二個檔案,並且將他重新命名。
package.json.sample 重名命名為 package.json
Gruntfile.js.sample 重名命名為 Gruntfile.js
4 安裝所需的Grunt工具,請照著以下步驟實行。
移至Magento的根目錄
cd <Magento 根目錄>
npm install
npm update
5 將您的主題包添加到Grunt的配置中。您有二種方式可以使用
5-1 開啟dev/tools/grunt/configs/themes.js檔案。將配置添加進去
<theme>: {
        area: 'frontend',
        name: '<Vendor>/<theme>',
        locale: '<language>',
        files: [
            '<path_to_file1>', //path to root source file
            '<path_to_file2>'
        ],
        dsl: 'less'
    },
5-2 在dev/tools/grunt/configs/底下新增一個local-themes.js檔案。
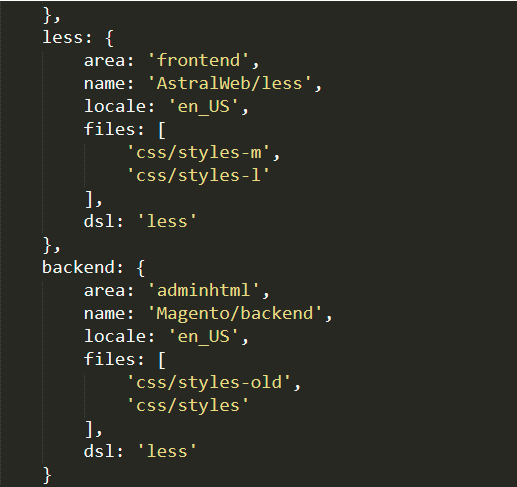
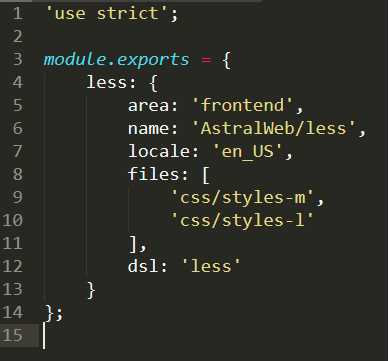
增加檔案的內容如下:
'use strict';

module.exports = {

        area: 'frontend',
        name: '<Vendor>/<theme>',
        locale: '<language>',
        files: [
            '<path_to_file1>', //path to root source file
            '<path_to_file2>'
        ],
        dsl: 'less'

};
6 照順序執行以下命令
grunt clean

grunt exec:<theme>

grunt less:<theme>

grunt watch
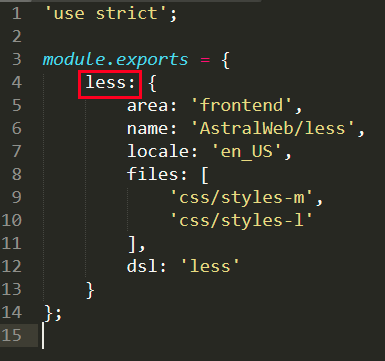
在截圖的實例中,我們為主題包設定的名稱是less,所以在執行grunt命令時,我們應該要使用
grunt exec:less

grunt less:less
7 俢改資料夾的屬性
chmod -R -v 777 pub/static var/cache
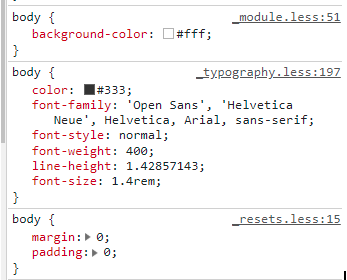 重整Magento頁面,並打開Google開發者工具
9.將滑鼠滑到_module.less:51 上面,可以得到less檔案的路徑,點擊_module.less:51 則可以直接看less檔的內容。
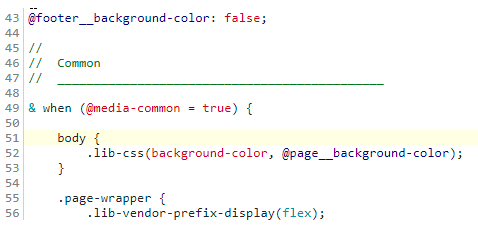
待調整完畢之後再重新deploy一次就可以囉。
以上是針對Magento2 原生工具來將LESS編譯成CSS的文章介紹,如果有您有更多疑問可以詢問我們,未來會撰寫更多電商網站相關文章,您想知道什麼嗎?歡迎在下方留言給我們。或追蹤我們的粉絲專頁,就不錯過最新文章喔!



我要留言